¶ Prepare RatOS
-
Download RatOS by clicking the button below.
-
Use a tool like SDcard Formatter to prepare the SD card before flashing.
-
Write the image to a 16GB or larger SD card using Balena Etcher.
¶ 01. Network Connectivity
-
Insert the flashed SD card into the Raspberry Pi and power on the machine.
-
Wait for the RatOS hotspot to appear on your control device (computer, tablet, or smartphone).
- This may take a few minutes, as the Raspberry Pi is flashing the new firmware.
- If the RatOS hotspot asks for a password, it is: "raspberry"
-
Connect to the hotspot and access the machine via a web browser at ratos.local.
-
On the dashboard, there will be an error, ignore it. It's only Klipper complaining that there is no configuration.
-
Open the Configurator (1) from the left-side menu and click on Setup Wizard (2).

-
Select your Wi-Fi network (3), enter the password (4), and click "Submit" (5).
-
If your Wi-Fi is not showing, click "Show Hidden Access Points" or simply reboot the machine.

-
Choose your printer hostname (e.g. myvc4) (6), then click "Save and Connect" (7).
Some browsers may not have localhost domains access enabled. If you have trouble connecting to "ratos.local", ensure your browser allows connection to a localhost domain.
¶ 02. Updates
Warning! Follow these steps carefully! Any mistake could damage the configuration and require re-flashing the Raspberry Pi.
- The machine will reboot after the Wi-Fi setup.
- Connect your control device (computer, tablet, or smartphone) to the same Wi-Fi network as your V-Core 4.
- Enter the hostname (e.g., myvc4.local) in your web browser.
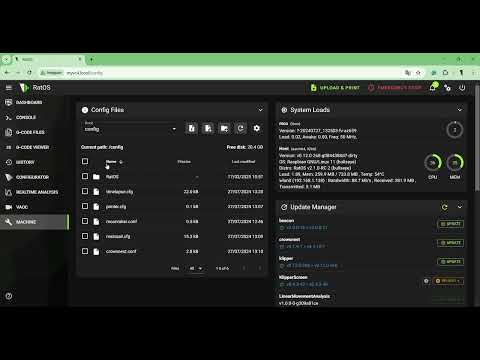
- Navigate to 'Machine' (8) in the left-side menu.

- Locate the update window and refresh it (9).
- Please note: The options may take some time to appear.
- Update RatOS packages by clicking the Update button (10) to prepare for third-party software changes. Wait for the machine to reboot, meaning the installation was successful. Refresh the webpage (press F5).
- Update the 'RatOS-Configurator' packages (11).
- Wait for the machine to reboot, meaning the installation was successful. Refresh the webpage (press F5).
- Click 'Update All Components' (12) at the bottom of the updater panel. Wait for the machine to reboot, meaning the installation was successful. Refresh the webpage (press F5).
If any of the packages appear "invalid" just refresh the browser page, it may be loading.

¶ Video Tutorial
¶ 03. Initial Configuration
-
Open the Configurator (1) from the left-side menu.
-
Go to the Setup Wizard (2).
-
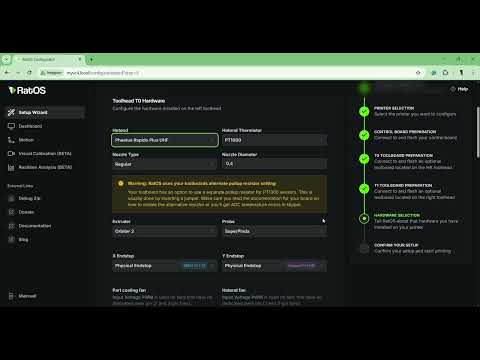
In the Printer Selection menu (3), choose the Hybrid (4) variant that matches your machine's size.


Follow the rest of the configurator to choose and flash your controller and toolboard, as well as select the appropriate hardware. During the configurator process, the standard V-Core 4.0 components are pre-selected. Unless your machine is not a standard kit, you should not need to change any parameters.
¶ Video Tutorial
¶ Next Guide
- Continue to the next guide: 02. Sanity Check